I vividly remember the first time I stepped foot into a darkroom. The sharp smell of the chemicals and the damp chill was intimidating at first; I only had a printed set of instructions to guide me through what seemed like a very complex process. I stumbled through developing my first roll of film to find that, hey, it’s really not all that difficult. Still, I followed the directions to a T, and eventually became much more comfortable, probably because I had memorized the worn piece of paper. I’d spend hours there, neglecting (what might have been) more important homework, but the darkroom transformed from a cold cave into my personal sanctuary, turning my love for science into an art form. The darkroom experience was part of a basic film photography class, which helped me to get an understanding of creating exposures and shooting in manual mode, as well as developing my own film and printing using an enlarger. The following year, I grew more adventurous, designing my own directed study in experimental darkroom photography. I explored double exposures, overlays, montages, and negative blending, and the darkroom became my playground for new and different techniques. I realized that this wasn’t just a class. This was something awesome.
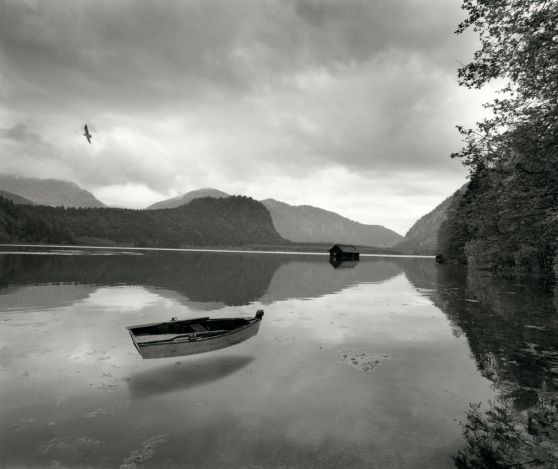
Jerry Uelsmann was my inspiration for this directed study, and his gorgeous works continue to take hold of me. His pieces of surrealism are all done in the darkroom; none of these are digitally altered. These mind-blowing prints are the result of days of shooting, developing, and exposing, standing at the enlarger and planning out the piece. You can check out some of his work on show at Lanoue Fine Art in Boston from September 14th to October 12th.
So how is this done? Here are four steps that can lead you there, but don’t be married to these directions. It’s art, after all – your spin is what makes it unique.
- Start with film. Begin shooting a roll of film with extreme compositions in mind, but think simple. For example, you might photograph an empty field featuring a single tree. Set the tree off to a far side of the frame. This creates an area for other elements to be “dropped in” once you begin altering the image. Think of empty space as an opportunity. If you’re photographing the human form, their bare shoulder or neck could be a place where you could add another element. You can also start “collecting” textures by photographing sand, stones/pebbles, water, tree bark, etc., which can be overlaid into an image, providing another dimension of interest. I prefer shooting in B&W because it offers the most simplicity, but you could certainly use color as well. I use true b&w film or color slide film, which means that the film can only be developed by traditional means. True b&w and color slide film tend to be closer to the actual exposure and often have a marginally higher grain to the image, which adds a bit of interest and character to the photo. I think the added texture makes it more alive. If you use C41 Process Film (what can be developed at local pharmacies and superstores), the contrast is often higher, the colors not as natural and the grain less apparent. The choice is yours, depending on what sort of look you’re going for.
- If you don’t have access to a darkroom, get the film developed at a local photo lab, even if you’re using C41 film (and support local business!). I prefer to not use a commercial superstore for developing my film because the quality and customer service is often a lot better at places that specialize in developing and printing. Request to have a contact sheet made – this is a great way to see all of the photos in one place as thumbnail images. It’ll help you to see how the photos can fit together, almost like a puzzle. If you’re going the digital route in editing your images, request a CD as well.
- Choose a few images and start playing! If you’re working in the darkroom, choose negatives and begin the printing process. Slip one (or more) negatives into the holder in the enlarger, and expose the paper. By burning (allowing certain sections to expose for longer periods of time) and dodging (covering portions of the projected image), you can make elements more apparent or “erase” areas of the photo. Remember to feather the edges of your burn or dodge so the change isn’t obvious. Then switch out the negative and replace it with a new one, dropping it into empty spaces or begin layering the images with texture. If you’re working in a digital format, it’s basically the same idea. Your layer blending mode will be a huge time saver; choose “multiply” and this will make your image almost transparent, allowing you to see what’s underneath. Or play around with blending modes, as each setting does something uniquely different.
- Last but not least, have fun! Try something new. Do a blind double exposure by shooting a roll of film and reloading it into your camera and shoot again. Or try blending your b&w negatives with color negatives. Mix digital and film. See how many layers you can add. Mess with perspective. Make a statement. Make it your own.
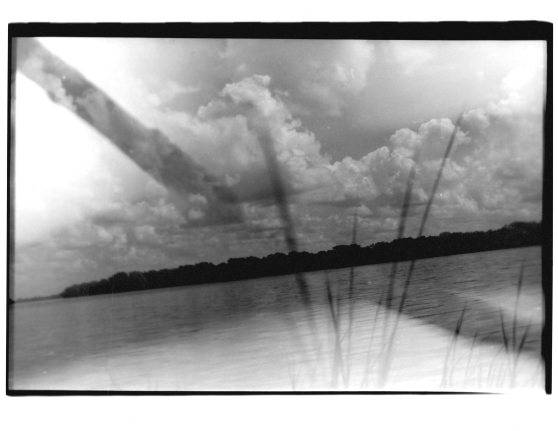
For this one, I sandwiched two negatives together in the same negative holder, and exposed both at the same time.
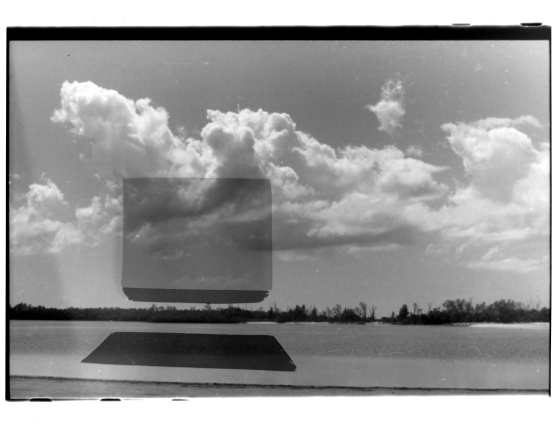
This one is just a single negative, but while the image exposed, I used a template made of heavy matte board to cover most of the image except for the squares. I exposed the main square for three seconds longer than the regular exposure for the image, then dropped the cutout square back into its hole while the other two shadow sections exposed for five additional seconds.
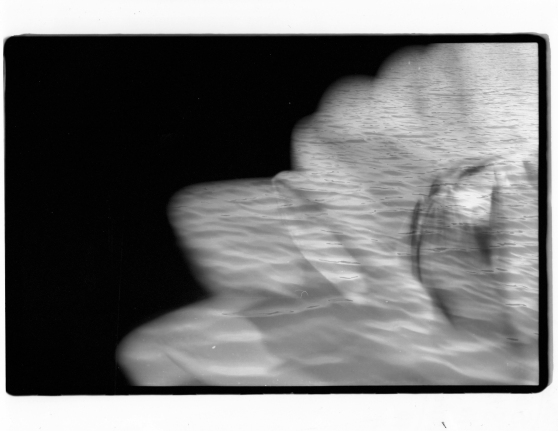
For this one, I used two negatives. I exposed the face first while dodging around the outside because I knew I wanted to use water as the background. Then I exposed the water, dodging around her face.
I exposed the flower first for 16 seconds, then added just a hint of texture by exposing the water for four seconds.
Give it a try. Maybe this could be the start of something awesome.


